Create your own JWT token
Voilà can integrate with your platform, allowing attendees to access the live stream using their corporate credentials. If your IDP supports SAML 2.0, have o look to SAML 2.0 Integration This guide provides developers with the necessary steps and information to integrate your with the Voilà Live Streaming Platform using JWT tokens. By following this guide, you can enable automated attendee identification within your own platform.
Prerequisites Before proceeding, ensure that you have the following:
- A Voilà account
- Knowledge of your preferred programming language for token generation on server-side
Introduction
Authentication and Authorization
Understanding JWT Tokens
JWT (JSON Web Token) is a compact, URL-safe means of representing claims to be transferred between two parties securely. It is commonly used for authentication and authorization purposes.
Why Use JWT Tokens
JWT tokens provide a secure and standardized way to exchange user information between your IDP and the Voilà platform. They are tamper-evident, can be easily verified, and provide a structured way to include user claims.
Understanding Partner Keys
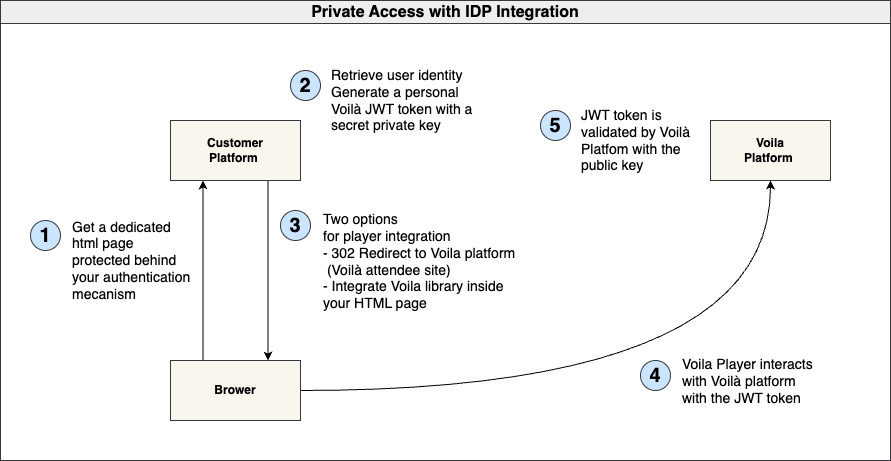
Partner keys, consisting of a pair of private and public keys, are a critical component in the Voilà platform for generating and verifying JWT (JSON Web Token) tokens. These keys facilitate secure communication and authentication between your customer's platform and the Voilà platform. Here's how the process works:
1- Generating JWT Tokens (Customer Platform - Server-Side): In the customer platform, the server-side code uses the private key from the partner keys pair to generate JWT tokens. These tokens are created as a means of authenticating and authorizing requests from your platform to Voilà. The private key should be kept secure and not shared.
2- Public Key Declaration (Voilà Backstage): The corresponding public key from the partner keys pair is declared or registered in the Voilà Backstage, which is Voilà's administrative interface. Voilà needs to know the public key to verify the JWT tokens generated by the customer platform. The public key is shared with Voilà, so they can validate the signatures on incoming JWT tokens.
3- JWT Token Verification (Voilà Platform): When a request is made from the customer's platform to Voilà, it includes a JWT token generated with the private key. Voilà uses the declared public key to verify the authenticity of the token. If the token's signature is valid, Voilà can trust that the request is coming from an authorized source (the customer's platform).
This process ensures that only the customer's platform with the matching private key can generate valid JWT tokens that Voilà can verify. It establishes a secure way for your platform to interact with Voilà and allows for authentication, authorization, and access control, which is crucial in a live streaming platform to protect content and control access.
To summarize:
- Private key (kept secret) is used for token generation on the customer platform.
- Public key is declared in the Voilà Backstage and used for token verification on the Voilà platform.
- The public and private keys together form a secure key pair for token-based authentication and authorization between the customer platform and Voilà. Managing these partner keys securely is essential to ensure the integrity and security of the interactions between your platform and Voilà.
Integration Steps
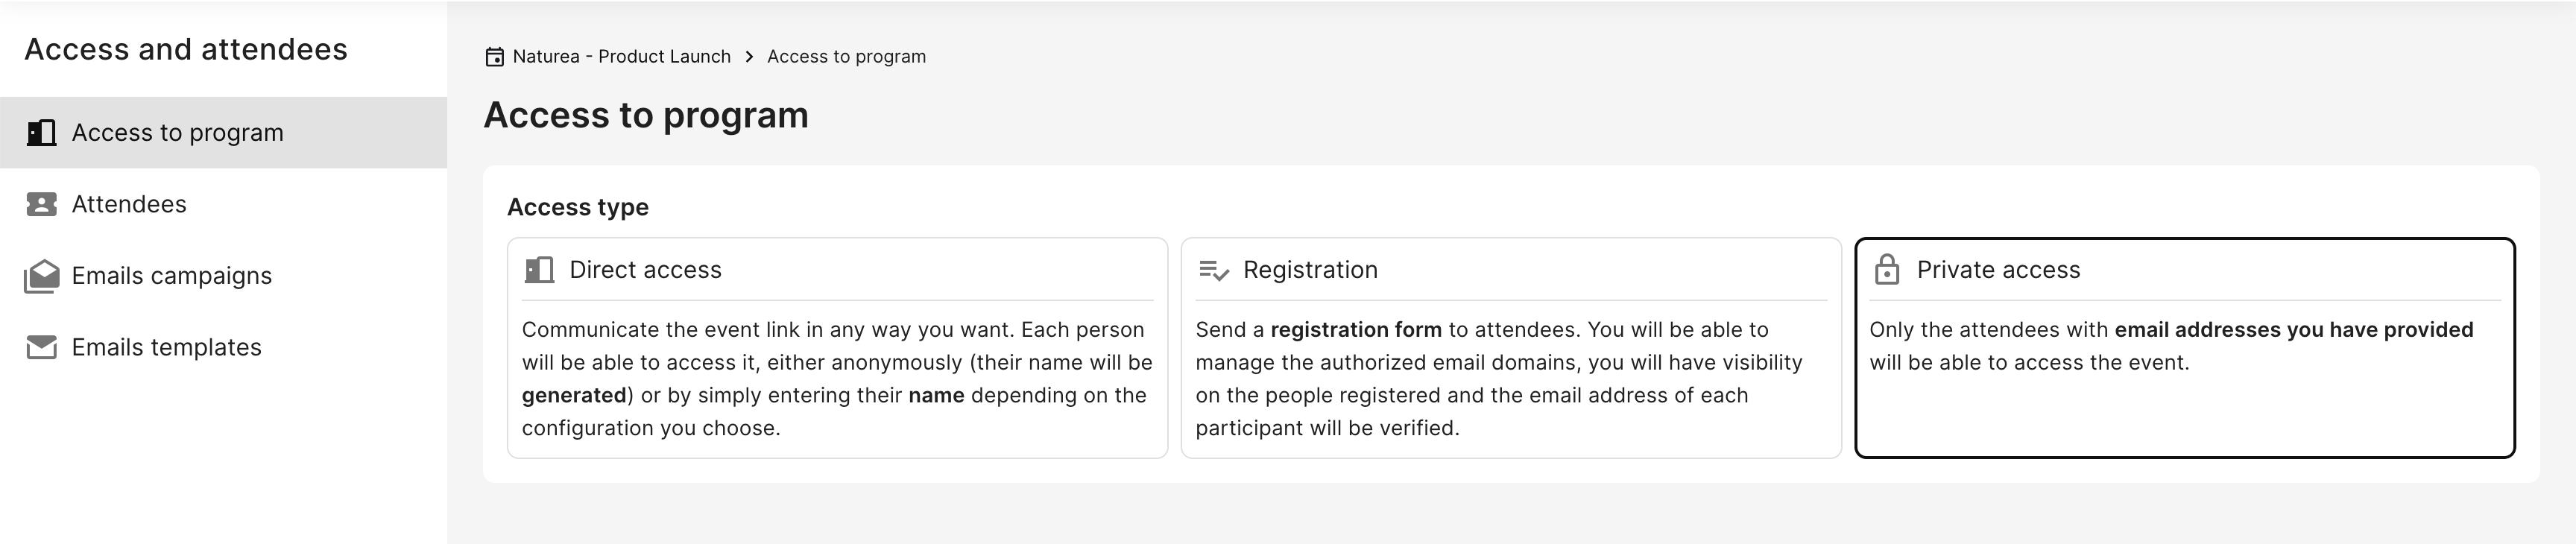
Step 1 - Create a Program in private mode
Private mode is a feature that enhances the security and access control of your livestreaming. It ensures that attendees are authenticated before they can access the live stream.
After creating your program and your page on backstage, you can configure the private access mode by clicking
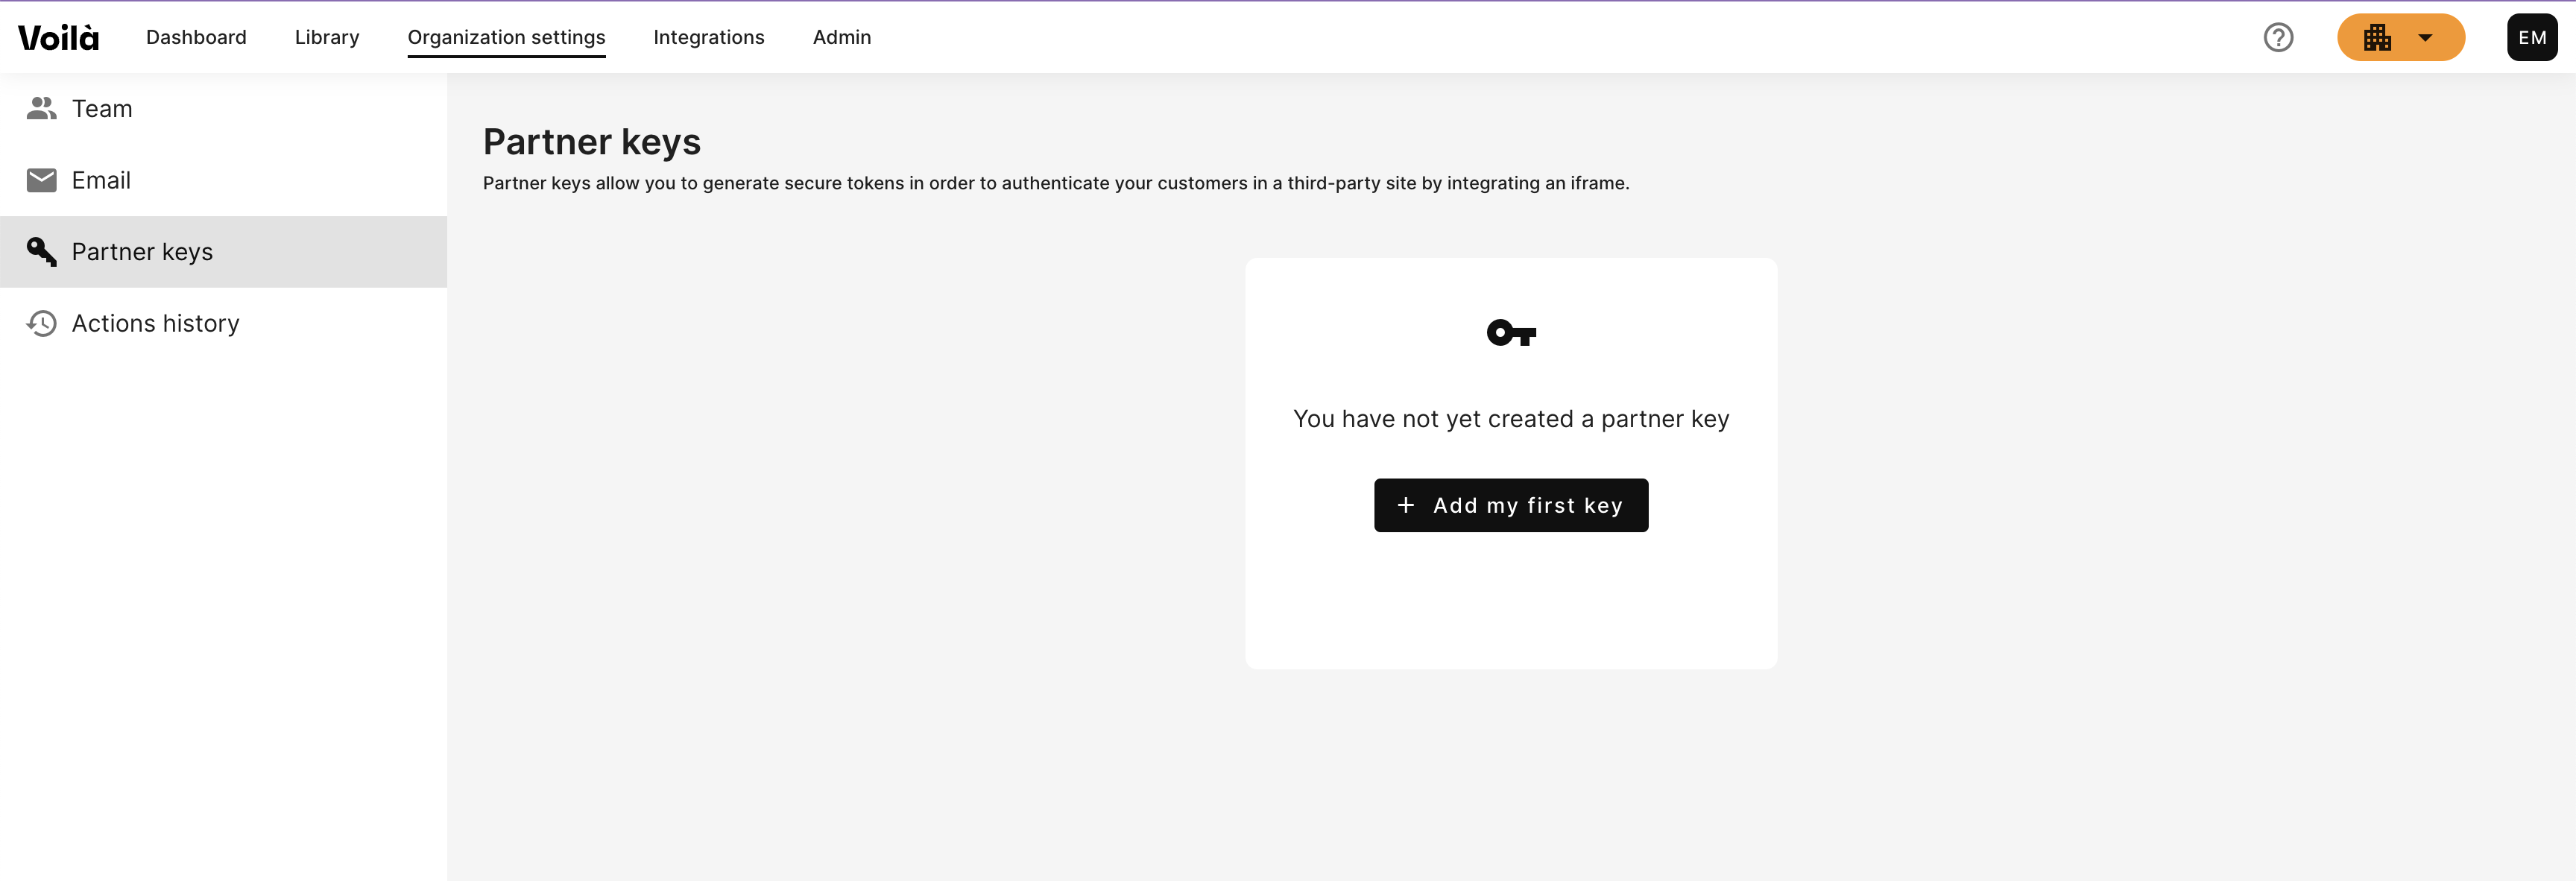
Step 2 - Generate your public and private partner keys
Partner keys allow you to generate secure JWT tokens in order to identify your attendees. You need to create a public key, and a private key.
Go to the organization settings / PartnerKeys and create one.
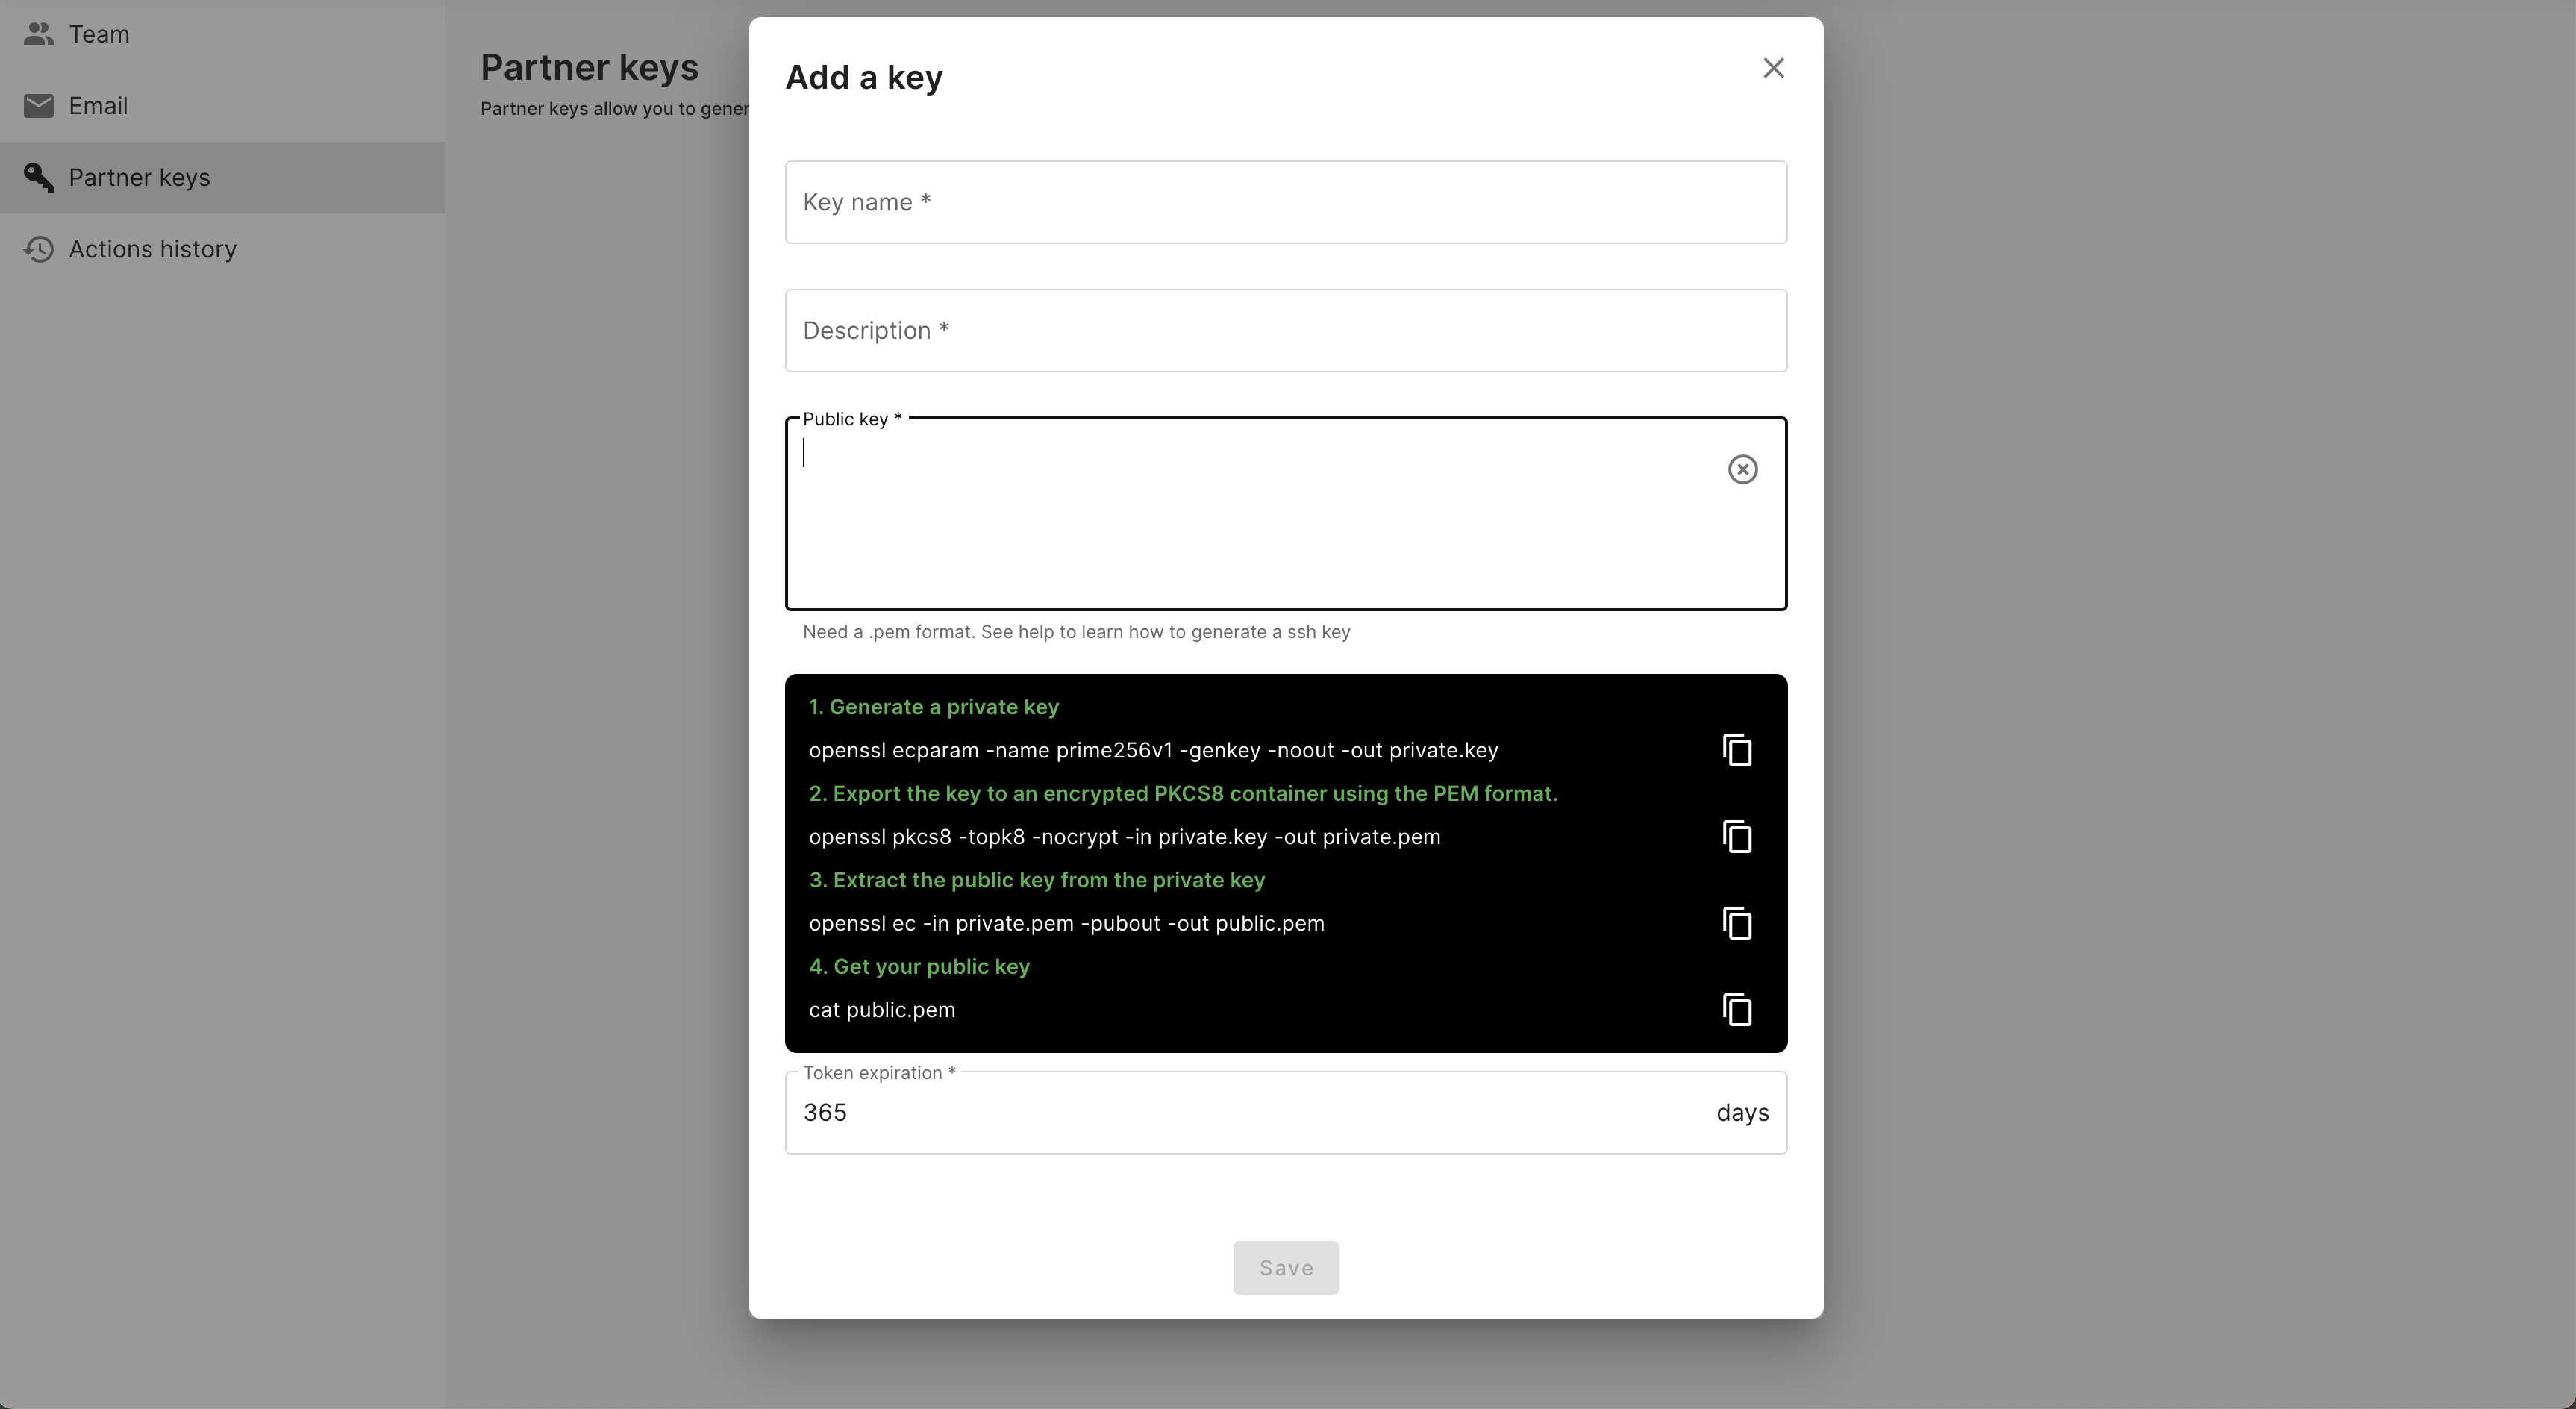
1. Do not forget to copy/paste also ----BEGIN PUBLIC KEY---— and ----END PUBLIC KEY---—
2. 💡For security reasons, the token has a limited duration that we have set at 365 days. We advise you to keep the indicated duration, to avoid any problem of integration for a possible future program.
To generate your public key, open a terminal and enter the following commands:
# 1. Generate a private key
openssl ecparam -name prime256v1 -genkey -noout -out private.key

# 2. Export the key to an encrypted PKCS8 container using the PEM format
openssl pkcs8 -topk8 -nocrypt -in private.key -out private.pem

# 3. Extract the public key from the private key
openssl ec -in private.pem -pubout -out public.pem

# 4. Get your public key
cat public.pem

# 5. Get your private key
cat private.pem
Step 3 - Generate Voilà tokens programmatically on your server-side
The token achieves two goals:
- only requests coming with a valid token signed by you will grant access to the live content, so we can prevent unauthorized streaming,
- each token should contain the mandatory identification fields that enable interactivity (chat, questions, extended screen, etc)
The token is based on the JWT standard. You can find more info about it here.
Token header
The header of the token should be:
{

  "alg": "ES256",
  "typ": "JWT",`
  "kid": "<KID>"`
}
Where KID is your key personal ID. We'll generate this KID when you'll provide us with your own public key, keeping for you your private key.
Token payload
The token payload should look like this:
{
  "organization_id": "**<organization ID>**",
  "token_use": "selfcontained-access",
  "given_name": "<Name>",
  "family_name": "<Surname>",
  "email": "<email>",
  "roles": [{
    "name": "ROLE_ATTENDEE",
    "eventId": "<eventId>"
  }],
  "sharePersonalData": "<GDPR flag>",
  "jti": "<JWT ID>",
  "iat": <Issued At>,
  "nbf": <Not Before>,
  "iss": "<Issuer>",
  "sub": "<Subject>",
  "exp": <Expiration Time>
}
Note:
eventIdequalsprogramId
Where:
sharePersonalDatais a boolean indicating if the attendee accepted to share personal data,jtiis a unique identifier for the token. It MUST be assigned in a manner that ensures that there is a negligible probability that the same value will be accidentally assigned to a different token (e.g. "1b1dde0a-4abd-4074-82db-8676bfe7854f”),iatis a timestamp that identifies the time at which the JWT was issued (e.g. 1637833318),nbfis a timestamp that identifies the time before which the JWT MUST NOT be accepted for processing (can be equal toiat),issis a string that identifies the principal that issued the JWT (can be a domain name or any string that identifies the issuer. e.g. “voila.live”),subis a string that identifies the principal that is the subject of the JWT. (can be an email or any string that uniquely identifies the attendee. e.g. “john.doe@mymail.com”).
You're free to use the name and surname properties as you like (for instance you can add the company name, or nicknames, etc). The name and surname will be displayed in the player activities as Chat, Question, Quiz...
Example with Node.js
const jwt = require("jsonwebtoken");
const privatekey = "MY_PRIVATE_KEY";

// Simulate user: you have to enter this information here thanks your SSO information
const user = {
  id: "<CREATE UNIQUE UUID>",
  firstName: "<ENTER FIRSTNAME>",
  lastName: "<ENTER LASTNAME>",
  email: "<ENTER EMAIL>",
};

const tNow = Math.floor(Date.now() / 1000);
const tEnd = tNow + 604800;

// build payload
const payload = {
  organization_id: "<ENTER ORGANIZATION_ID>",
  given_name: user.firstName,
  family_name: user.lastName,
  email: user.email,
  roles: [
    {
      name: "ROLE_ATTENDEE",
      eventId: "<ENTER eventId>", // programId = eventId
    },
  ],
  nbf: tNow,
  iat: tNow,
  exp: tEnd,
  jti: String(tNow),
  sub: user.id,
};

const accessToken = jwt.sign(payload, privateKey, {
  algorithm: "ES256",
  keyid: "<ENTER KID>"
});

console.log(accessToken);
}
Note: your private has to be on secure server
Step 4 - Integrate generated JWT token with Voila player
Integrating the Voilà player into a website can be done in two ways:
- using the Voilà Attendee Website hosted by Voilà
- integrating the Voilà player into the customer website (more details).
Each option has its own advantages and considerations, and the choice will depend on the specific requirements and preferences of the organizers. Here's how to use the JWT token for both options:
Option 1 : Voilà Attendee Website Integration
Redirect with token as a query param
After generating the JWT token, the server initiates a redirection to the Voilà Atendee Website where the live streaming content is hosted. This redirection can be done through a HTTP 302 redirect to a URL.
As part of the redirection URL, the server appends the JWT token as a query parameter. This means that the JWT token is added to the URL in the form of a query parameter, like this:
https://attendee.voila.live/programs/<programId>?token=your-jwt-token.
Option 2 : Customer Website Integration
Only works on programmatically integration
inject script in your website
<script
        id="voila-library"
        type="text/javascript"
        defer
        src="https://developer.voila.live/lib/v1/voila.js"
></script>
Set your token to Voilà and render.
// Choose a way to get the generate Voilà token
// By cookies, an xhr etc...
// And set it
voila.setToken({ token: '<VoilaToken>' })

// and render programmatically
voila.render('YOUR_ORGANIZATION_ID')
Voila platform validation.
The Voilà platform automatically extracts the JWT token from the Voilà player and uses the public key declared in the Voilà Backstage to verify the JWT token's signature. If the JWT token is successfully validated, the user is granted access to the live streaming. The activities (chat, questions, poll...) during the livestreaming wil be based on the user's identity and permissions contained within the JWT token.